Flexor tendon fixation brace installation instructions
1. preparations
- Check Accessories: Check whether the power support, splint, fixing bracket, screw, elastic line, hook and loop, sponge lining, etc. are complete and intact.
- selection brace: According to the patient’s hand injury (single finger/multi-finger) and body type, select the brace of corresponding specifications.
2. splint shaping
- heating softening: Wear heat-insulating gloves to put the splint inin hot water at 65 – 70°C, soak for 2 – 3 minutes until soft, remove and drain.
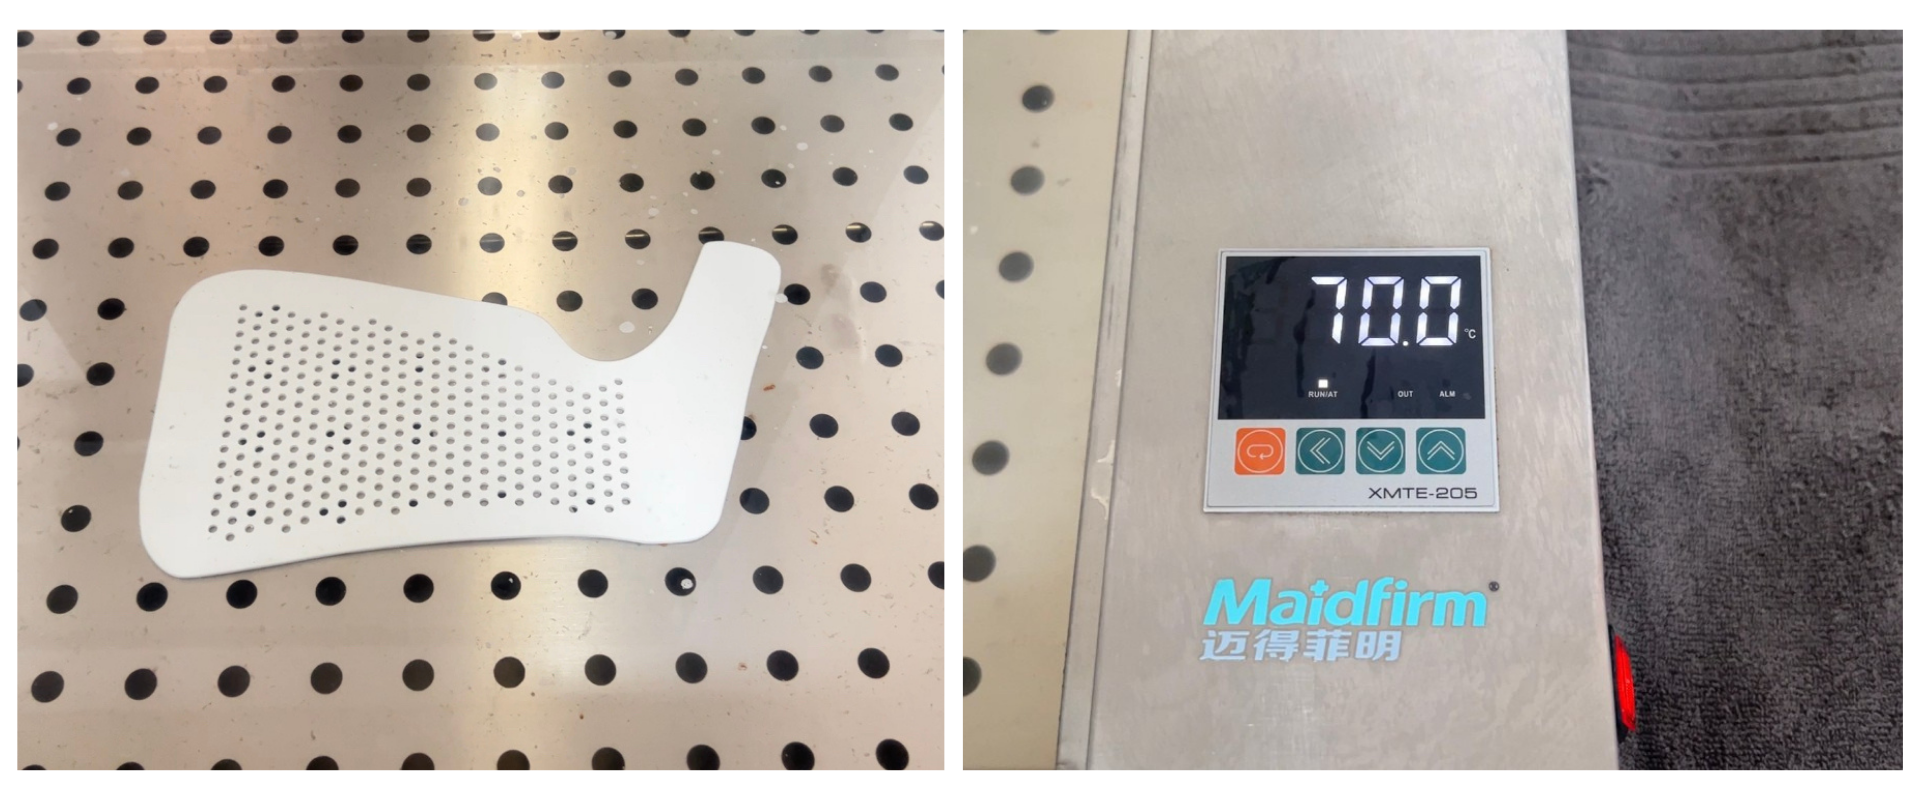
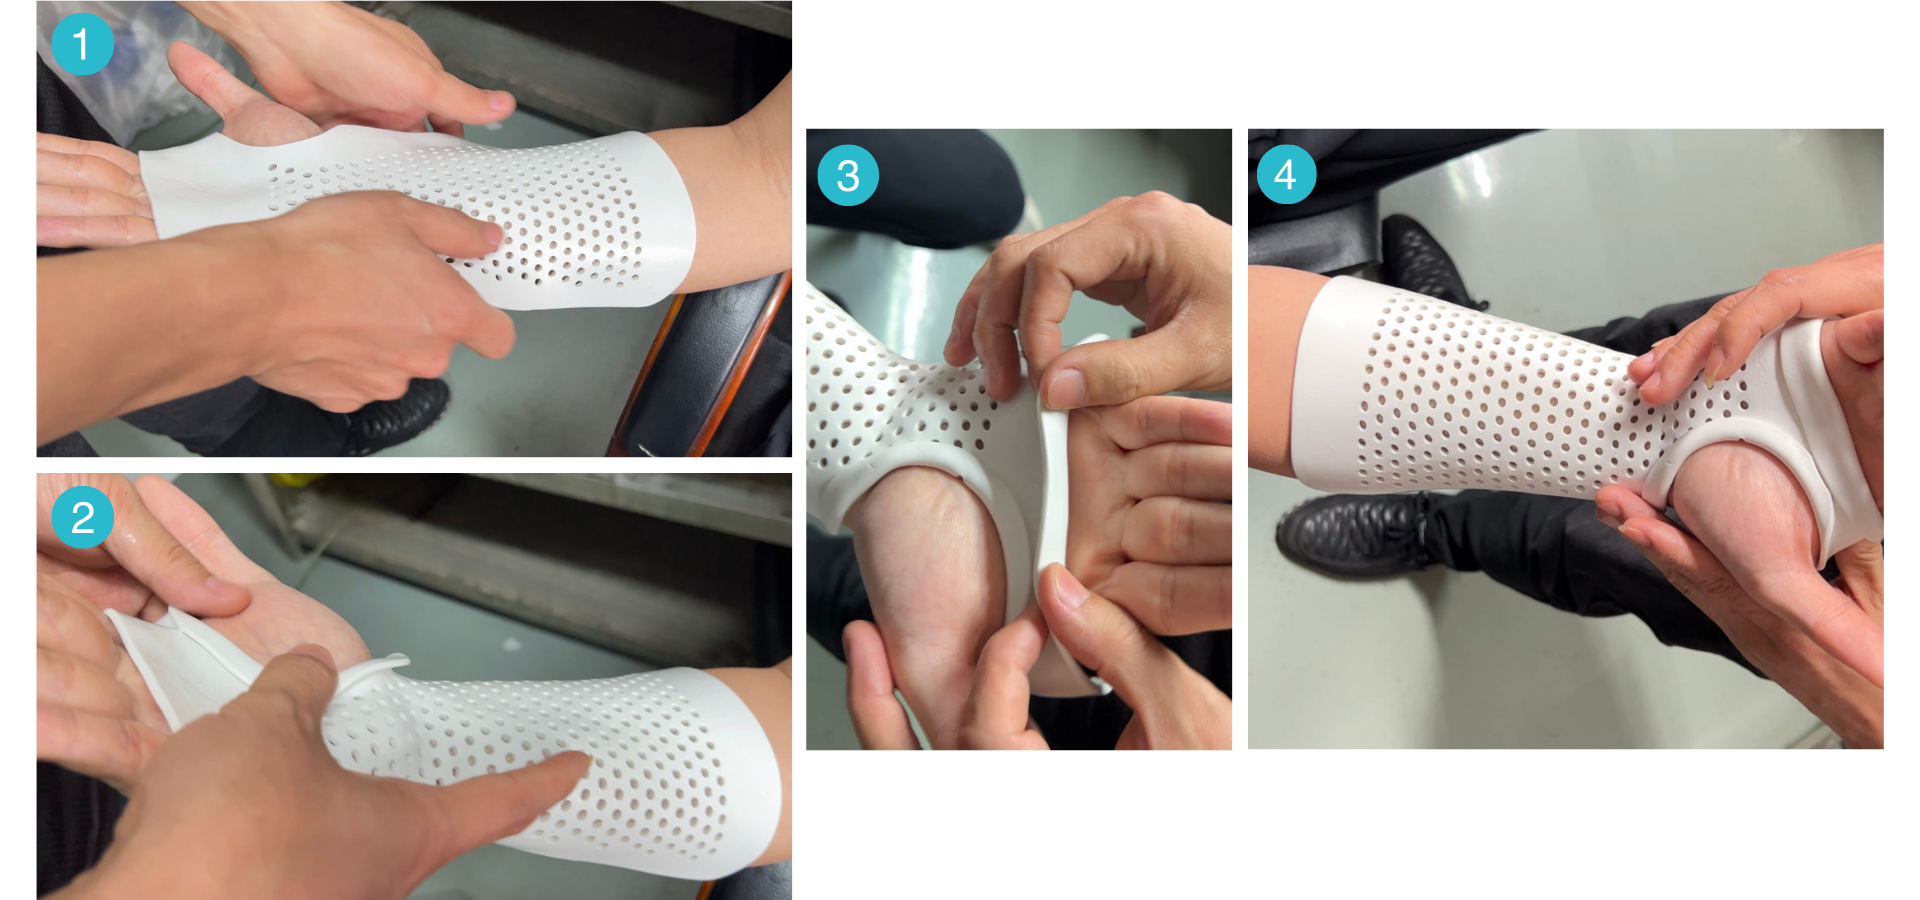
- Fit and fix: Put the splint on the palm side of the wrist, align the palm stripes, adjust the position of the thumb, and let it stand after shaping.3 – 5 minutes to harden.
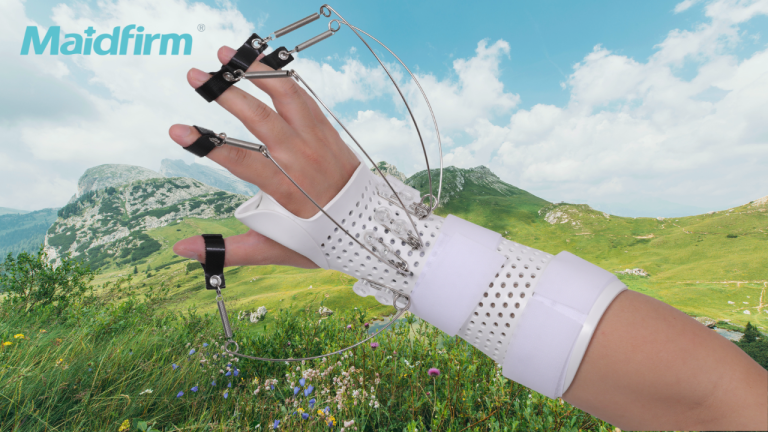
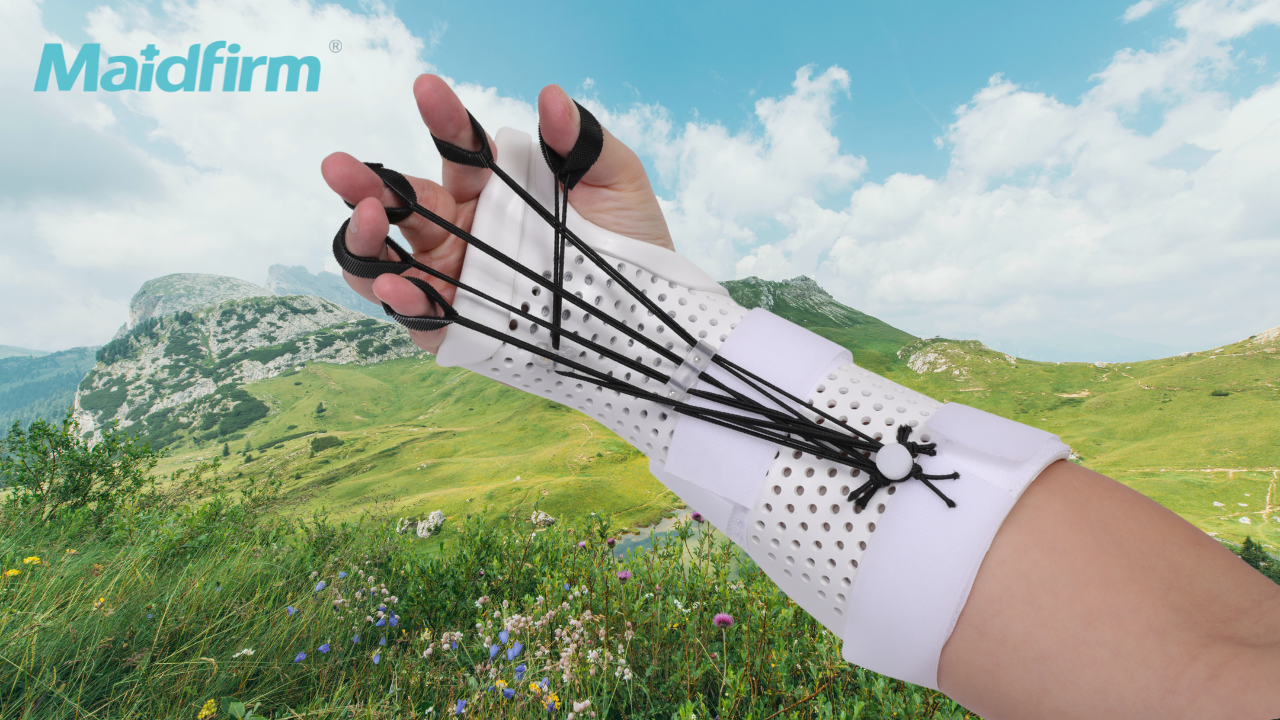
3. Bracket Installation
- elastic wire threading: The elastic wire passes through the bracket hole, one end is fixed on the middle section of the finger with Velcro, and the other end is hung on the screw.

- fixing bracket: Fix the bracket with screws; Note Fig. 4 & Fig. 5,The left hand splint installs the thumb holder on the right side, and the right hand splint installs the thumb holder on the left side.
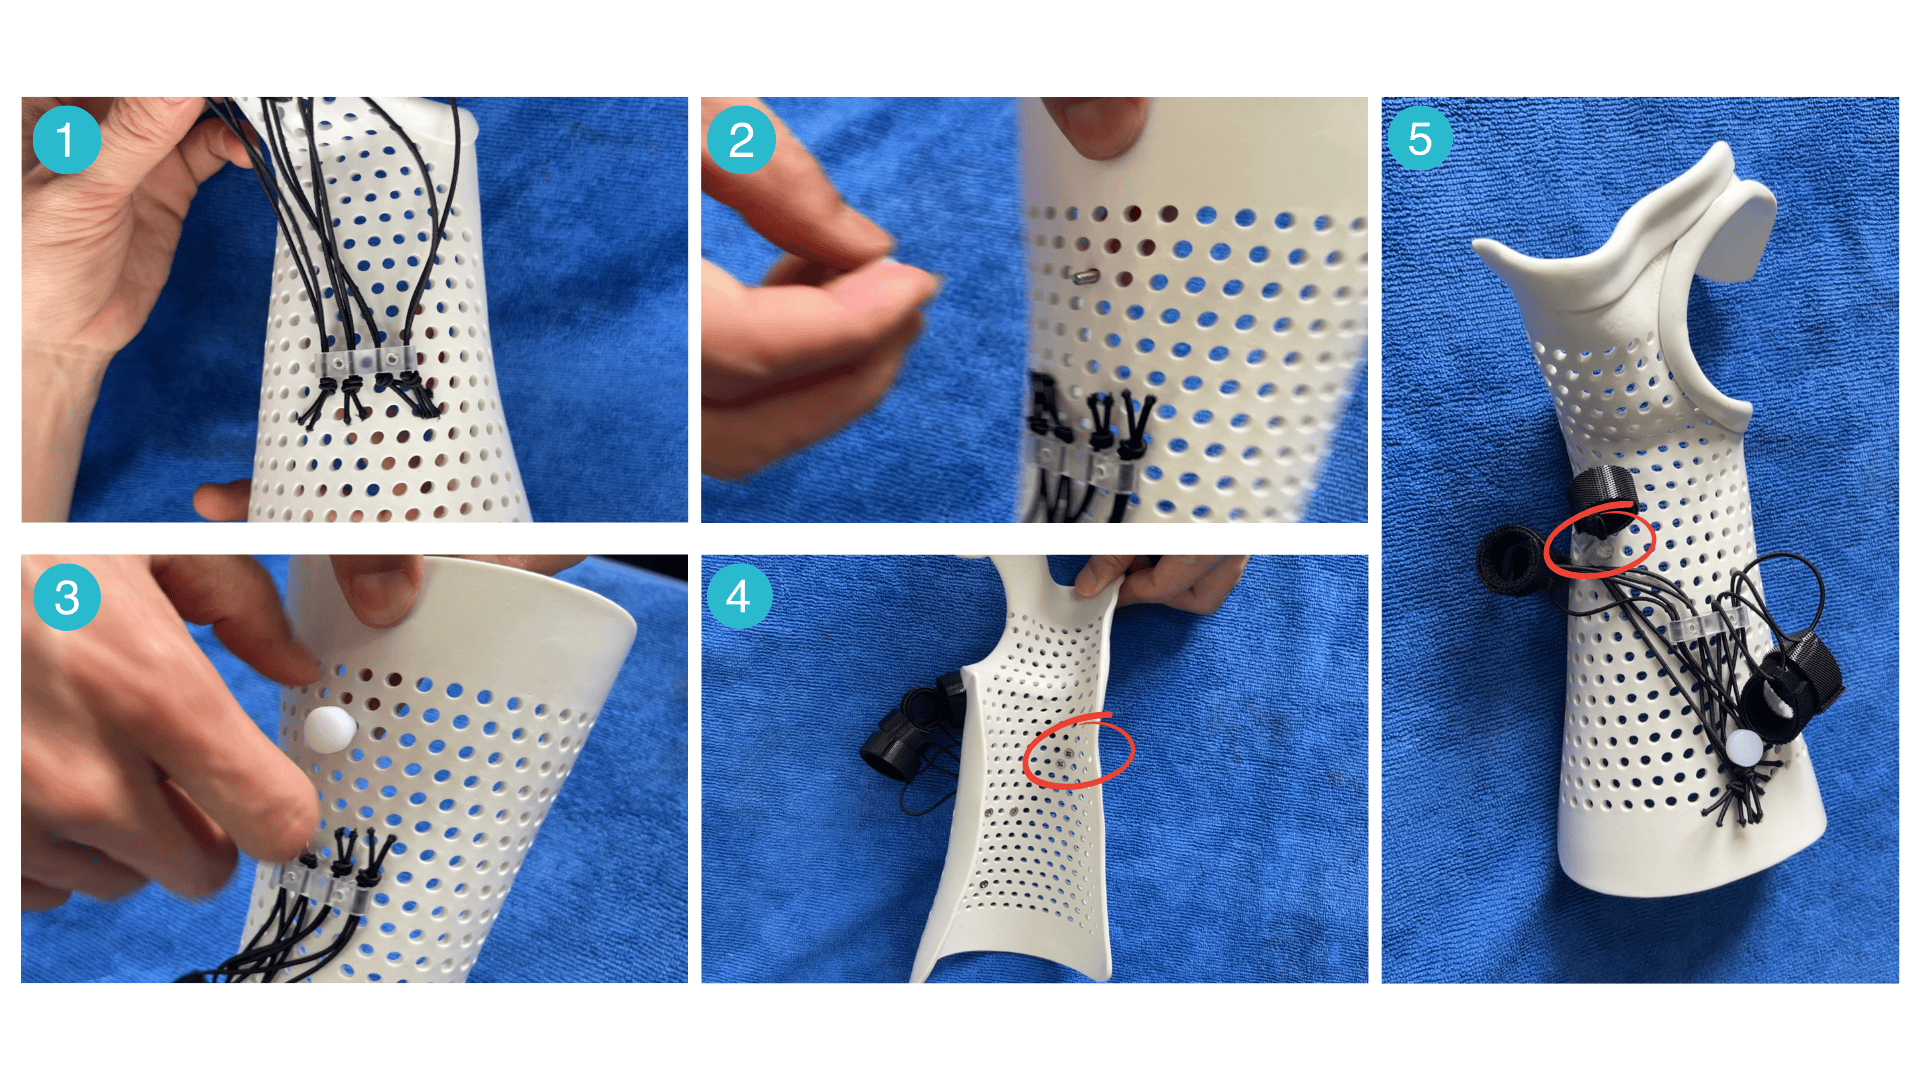
- adjustment: Adjust the elastic line tightness according to the actual situation.
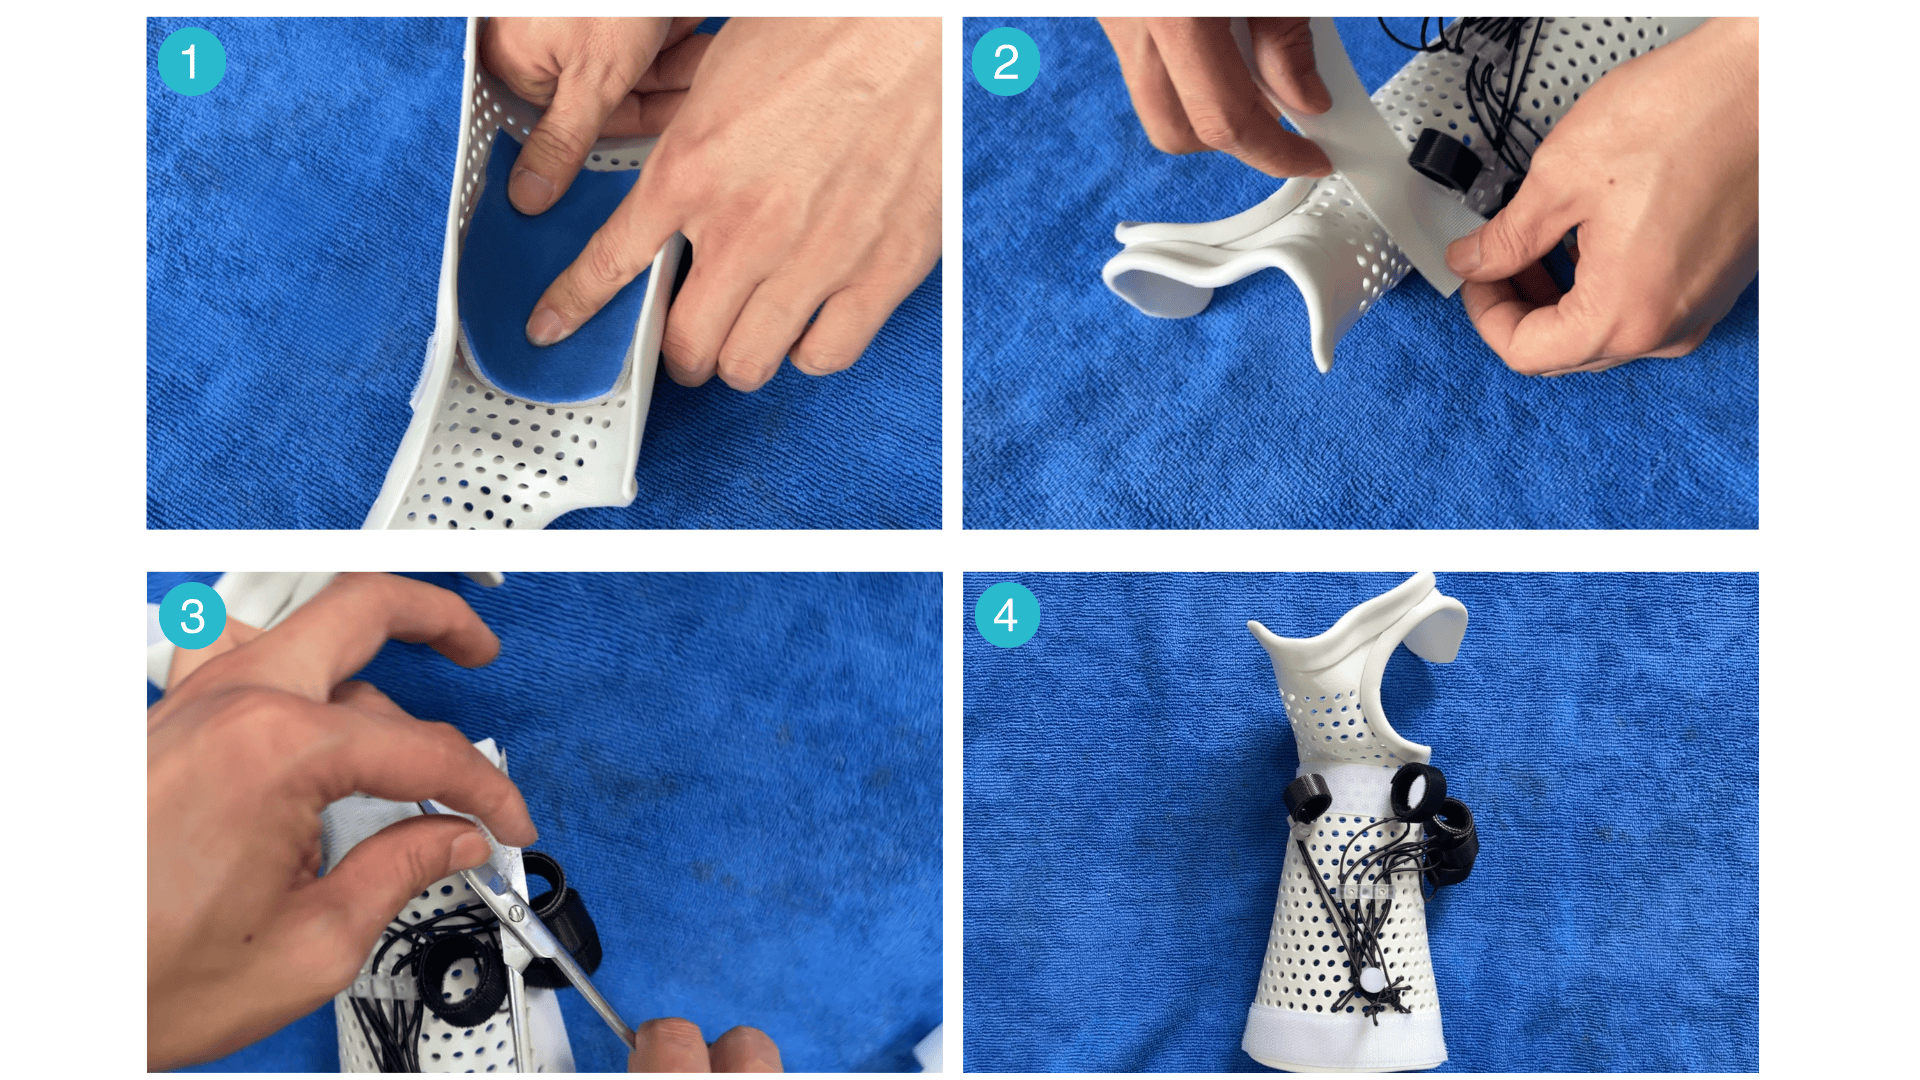
- skin protection:there may be screws and other parts of the skin, paste sponge lining, to prevent skin damage.attach the two Velcro inside the package to the picturethe 2 & 4 position and use scissors to cut off the extra Velcro.
4. check use
- move the patient’s fingers to confirm that the joint movement is smooth and the brace is free of jam.
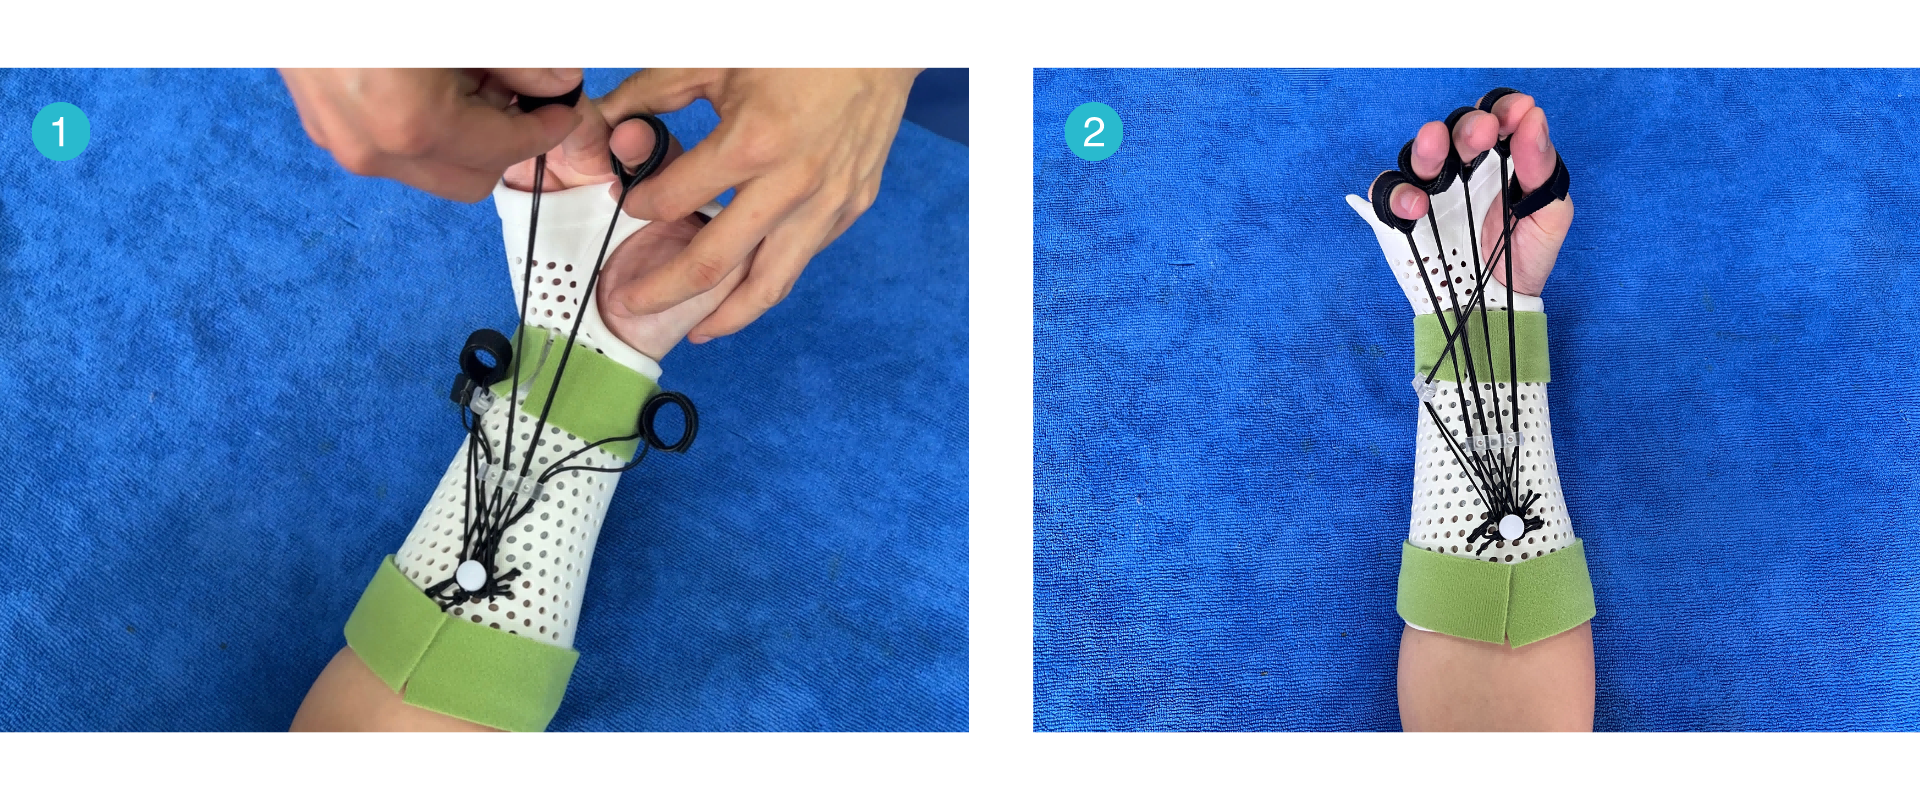
- check whether the parts are firmly fixed, to ensure that it can be used after wearing comfortable without pressure.